
Adebanji Alade’s One Day Urban Landscape Workshop in London.
Hi guys, I am back here again, this time with a process of how I paint an Urban Landscape using the INSIDE OUT method. In this method I start from one spot and continue to flow through the who painting, bring each phase to completion as I go along. I also have a date and venue set for my Urban Landscape Workshop this Saturday in London, make it a date. I’ll talk about that at the end of this post.
THE PROCESS OF PAINTING AN URBAN LANDSCAPE USING THE INSIDE OUT TECHNIQUE
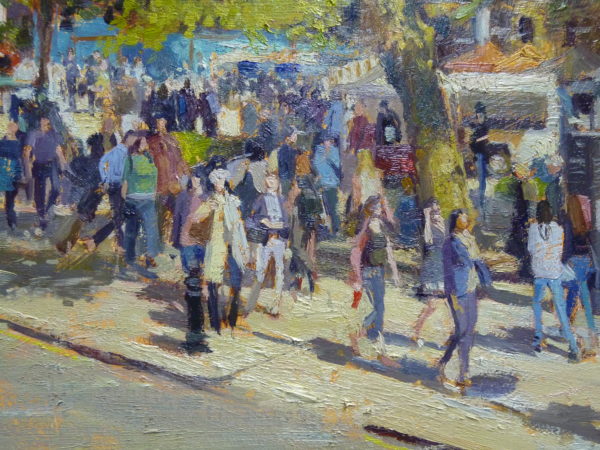
This piece is of a busy weekend day at Duke of York Square, Kings Road, Chelsea in the summer. I titled it “Summer Shadows, Duke of York Square”.
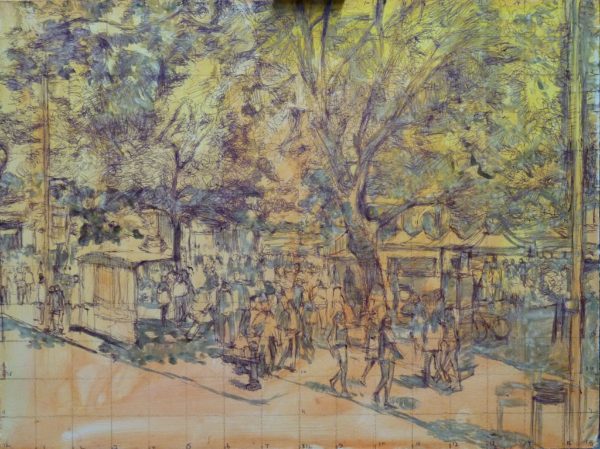
STAGE 1
This is where I make an accurate drawing of the whole scene, I actually drew this one with a ball point pen and ZIG Art & Graphic Twin Pens no 75. I am very careful to make sure that the drawing or sketch is accurate-to the best of my ability. I am painting on an MDF board, it has been primed with gesso and I have added a brownish-orange wash to it so that the greens of the trees would have a bit of warmth echoing under the piece in the finished painting. The grid lines on the painting are done because I was working from a photograph and I wanted to make sure that I got everything into the right place and in the right proportion. I have searched for the picture but couldn’t find it but once I do, I’ll be adding it to this post.
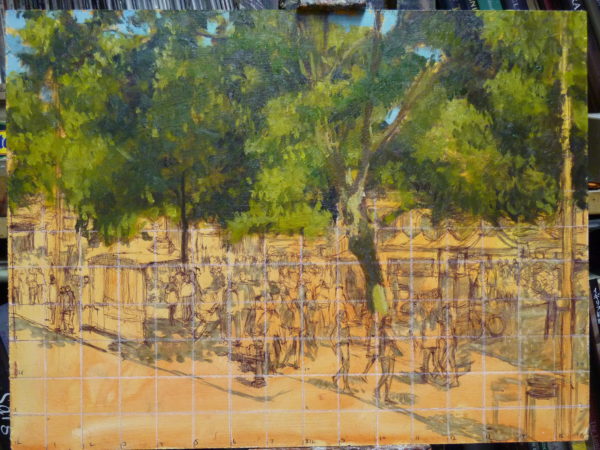
STAGE 2
This is where I start painting little by little, shape by shape, to make sure the part that I am painting gets completed as I go along, nothing is left till later, once an area is being painted, I bring it to completion before I move on to the next. I start with the tree which is the main element of the scene and I add little pockets of sky here and there while painting the tree. I always start with the darkest bit first and then paint the middle tones and then the lights. I always work from dark to light. I am very careful to make sure that my edges are carefully accounted for. When painting trees, the edges of the shapes are mainly soft and lost.
STAGE 3
At this stage I start thinking about the background, since the tree is complete. All the shapes in between the trees are painted and I start with a few figures too, I start by painting the shadows of the figures first. Having some sort of detailed drawing is so essential with this method, it helps me to put the paint on freely because the drawing is accurate. A solid drawing foundation is always important in painting, it gives the painter the liberty to express with paint later on. I also work on the road, my brush strokes are loose and free but I am not painting fast. Fast never works with this method.
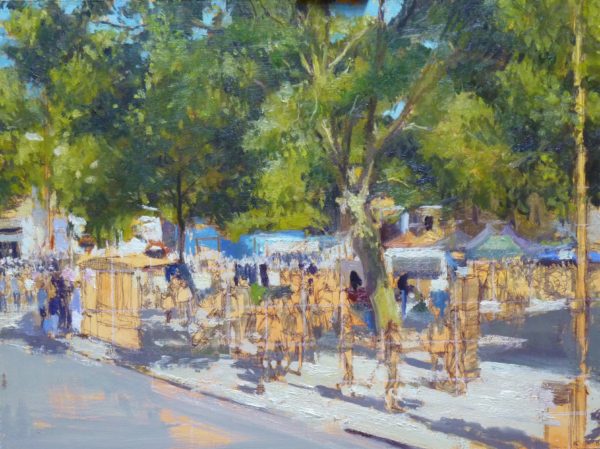
STAGE 4
At this point the painting is almost complete. I paint most of the figures in and the method I use is just to make sure that I get the right shape of what I am painting. I never think of the figures as people but I see them as little shapes here and there, that connect with each other. Below is a detailed section of how the figures look.
Detailed section of the brushstrokes and colours. You can see how the shapes all work together, nothing is detailed but it is painted on a detailed drawing.

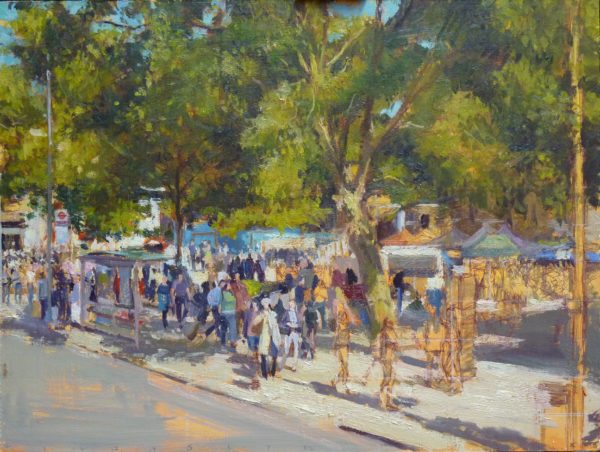
STAGE 5- FINAL Summer Shadows, Duke of York Square, Oil on board, 16″ x 12″
Everything is complete! Can you see little bits of the warm underpainting peeping through? Those spots were deliberately left to contrast the cools of shadows and the greens of the trees. The system of painting with this method is strongly based on sketching and drawing skills and if you need to improve your drawing, please check my previous HOTSHOTS on this sketchinspiration blog to get a lot of tips on how to improve your sketching. Sketching improves your painting and gives you the confidence to take on very complicated scenes with ease. This is the reason why I spend so much time sketching and I am an ambassador of the SKETCH MENTALITY! I hope I can get you sketching and falling in love with drawing, if I can achieve this, then I know I’ll get great painters out of you! Hope you enjoyed this!
Below is my FULL palette of colours I use. From left to right:
- Titanium White
- Lemon Yellow
- Cadmium yellow pale
- Cadmium yellow deep
- Yellow Orche
- Raw Sienna
- Terra Rosa
- Burnt Sienna or Transparent Red Oxide
- Cadmium Red
- Permanent Rose
- Alizarin Crimson
- Magenta
- Dioxanzine Purple
- Ultramarine Blue
- Cobalt Blue
- Cerulean blue
- Virdian Green

Below are the weird looking brushes I use
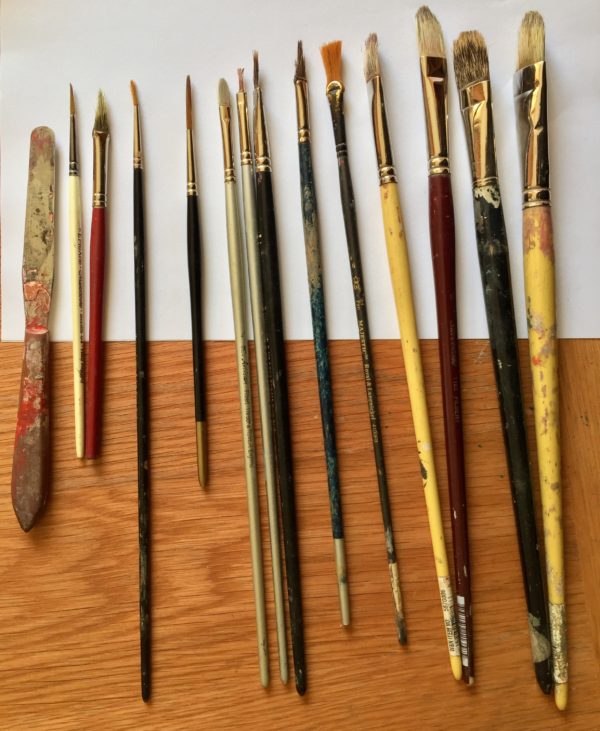
The weird looking brushes I use, I cut them up to suit my taste
And if you found this interesting and you want to have a full day where you watch me demonstrate and also help you with your urban landscapes, helping you to resolve little knots that normally arise like shadows, figures, proportion, perspective, edges, trees, cars….. then make sure you are present at my WORKSHOP in London next Saturday! PLEASE CLICK HERE FOR DETAILS
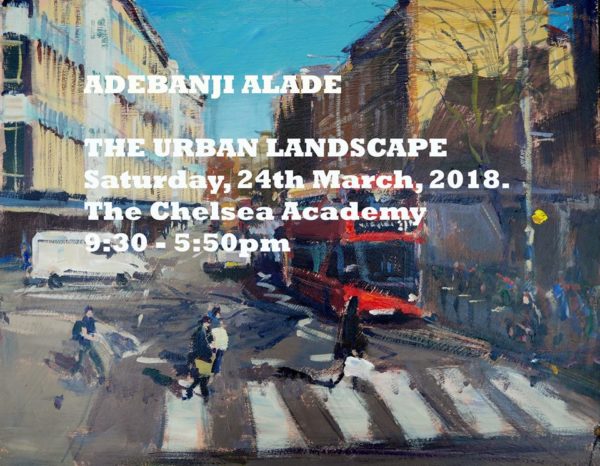
Adebanji Alade’s One Day Urban Landscape Workshop in London.